WooCommerce integration
Connect a WooCommerce store to WooshPayment via REST API. Works with WordPress 6.0+ and WooCommerce 8.0+.
The WooCommerce integration uses the official REST API. It works with WordPress 6.0+ and WooCommerce 8.0+. The store must be on HTTPS.
Recommended WooCommerce setup ⚡ — You need two pieces:
- Official WordPress plugin to intercept the "Proceed to checkout" button without touching the theme.
- WooCommerce REST Consumer Key + Consumer Secret to create the real order in WooCommerce after payment.
This page covers the REST API keys. For the plugin: See plugin install.
The WordPress / WooCommerce admin screenshots are illustrative renderings (those would require WordPress admin credentials we can't ship here). Step 2 is a real screenshot of the WooshPayment Dashboard.
1. Generate the API keys in WooCommerce
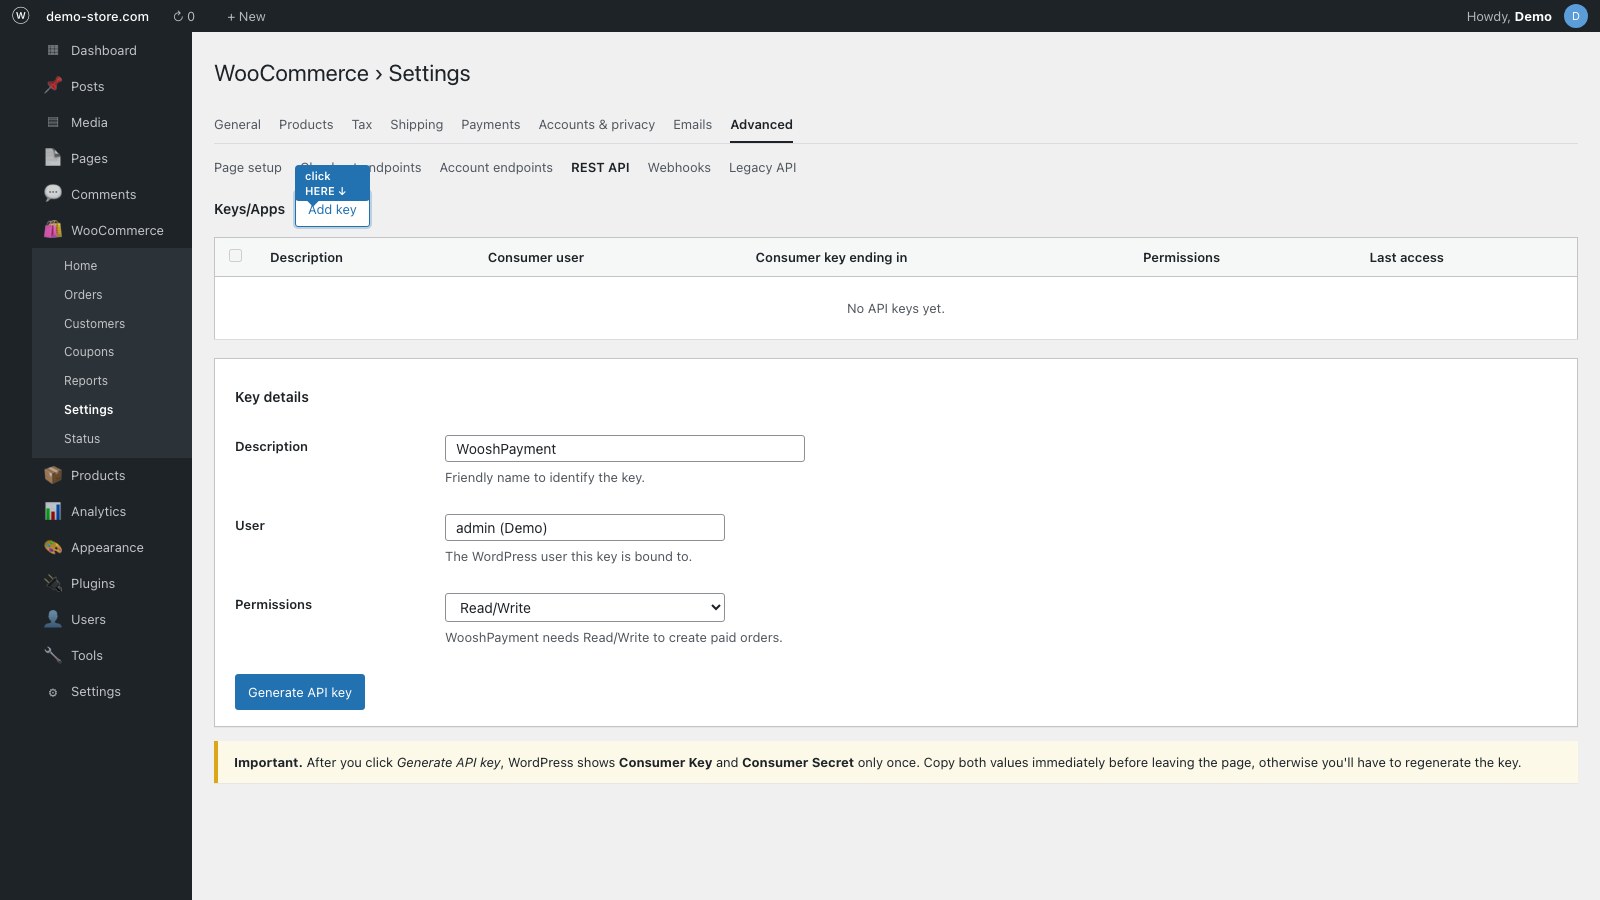
- WordPress Admin → WooCommerce → Settings → Advanced → REST API
- "Add key"
- Description:
WooshPayment - Permissions: Read/Write
- Save — copy Consumer Key and Consumer Secret (shown only once)
Store the keys in a password manager. If you lose them, you'll have to regenerate them and WooshPayment will stop creating orders until you re-enter them.
2. Connect on WooshPayment
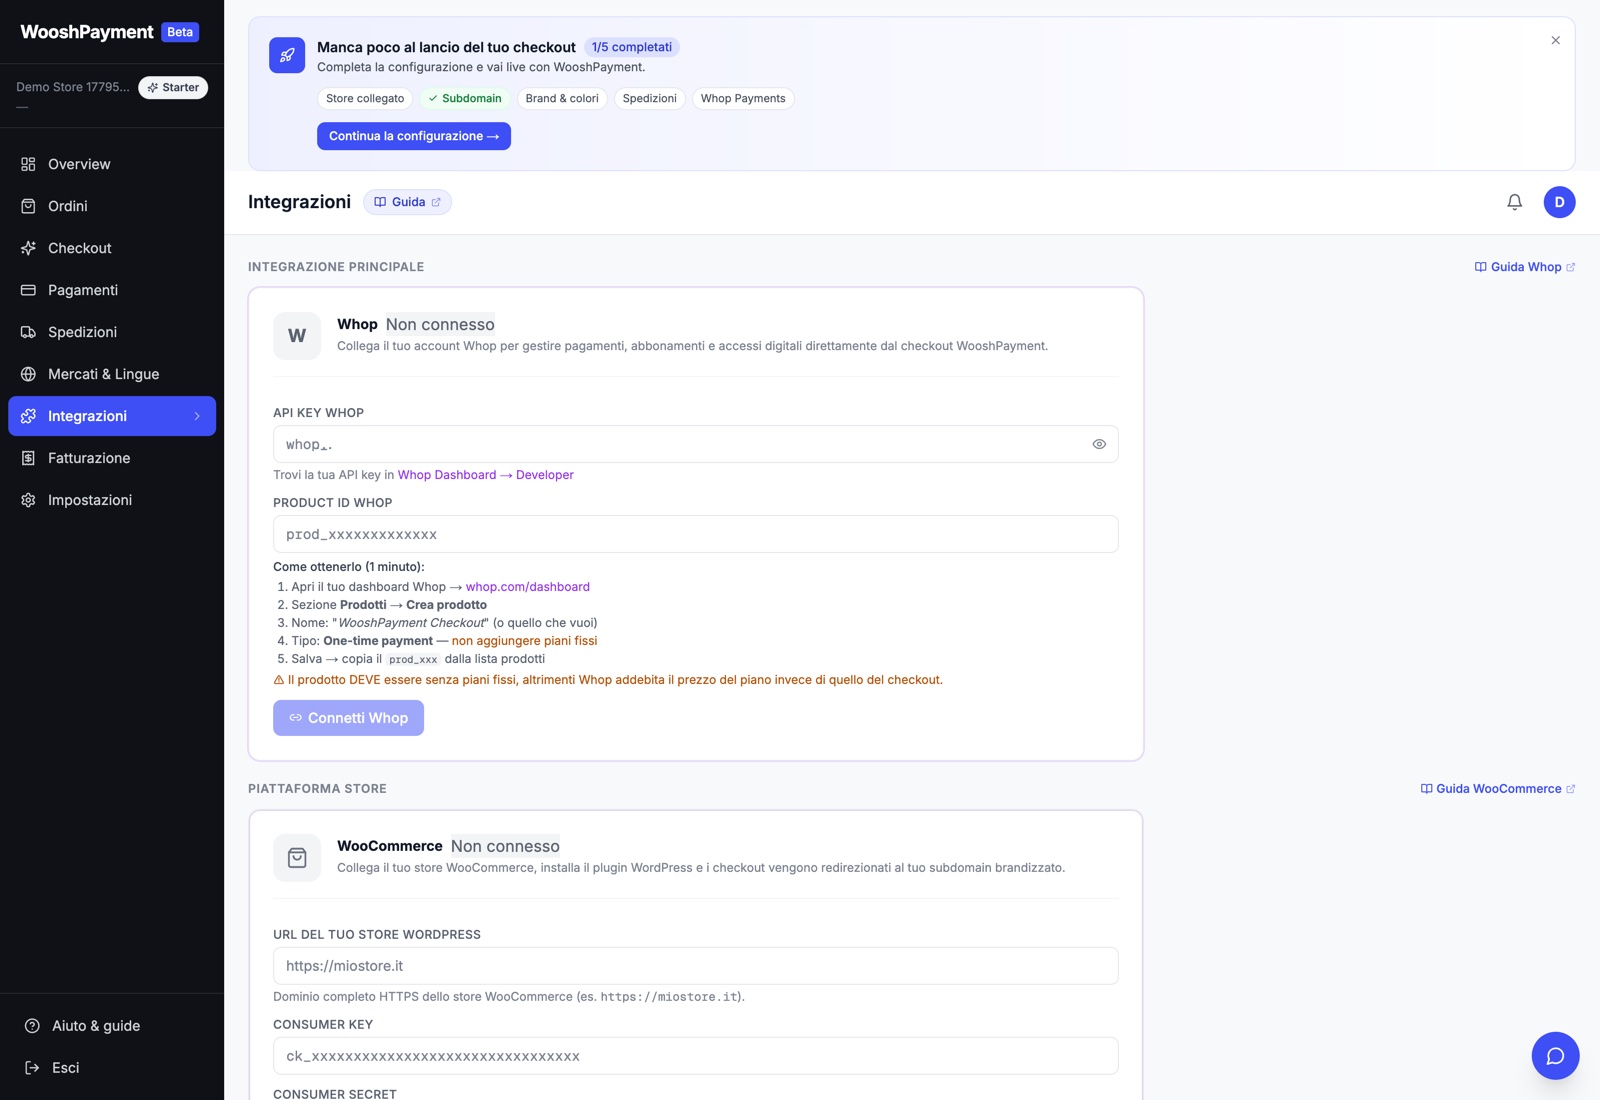
- Dashboard → Integrations → WooCommerce (or the onboarding "Platform" step if this is your first setup)
- "WooCommerce" section → fill in:
- Store URL: e.g.
https://my-store.com(no trailing slash) - Consumer Key: paste
- Consumer Secret: paste
- Store URL: e.g.
- Click Connect WooCommerce → WooshPayment pings
/wp-json/wc/v3/products?per_page=1to validate the keys
Credentials are encrypted at rest (AES-256-GCM).
3. Checkout button redirect
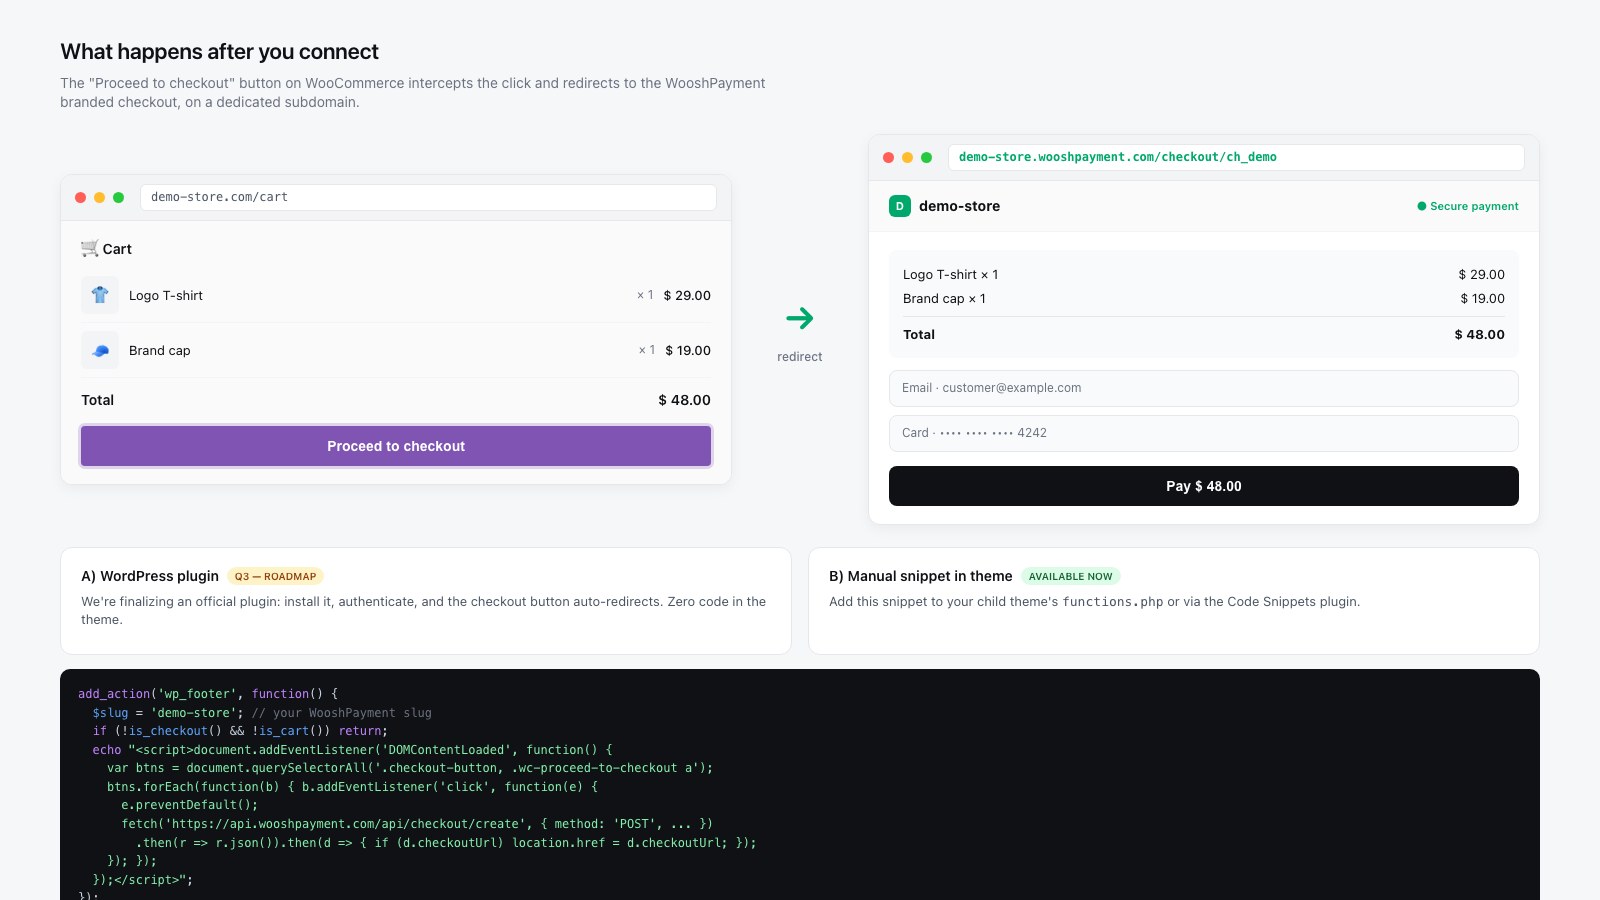
To intercept the WooCommerce checkout button, use the official WordPress plugin. The plugin reads the real cart via the WC Store API, normalizes prices/currency/coupons, preserves products and variants, and redirects to {slug}.wooshpayment.com.
REST API keys alone create the WooCommerce order after payment, but they do not intercept the checkout button. For the public WooshPayment product, the supported WooCommerce redirect path is the official plugin. If your hosting does not allow custom plugins, contact support before launch: a custom integration must be validated case by case.
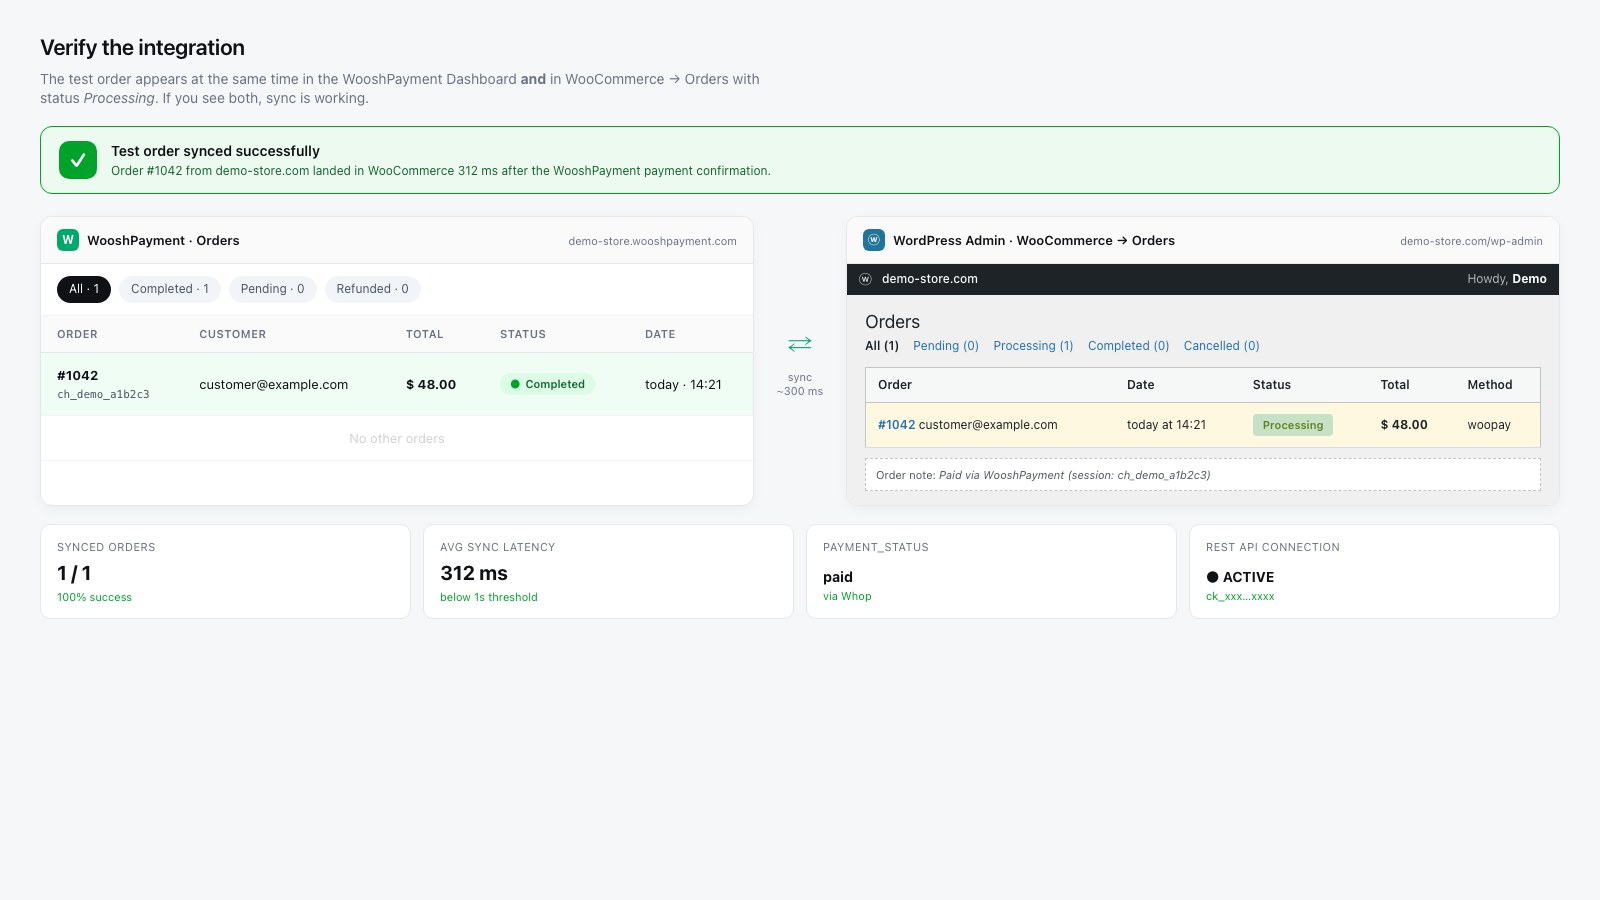
4. Verify
- Open the store in incognito
- Add a product → go to the cart
- Click "Proceed to checkout"
- After the plugin is active, REST keys are valid, the active plan is in place and Whop/COD is ready, you must land on
{your-slug}.wooshpayment.com/checkout/... - Complete a test payment
- Verify the order in WooCommerce → Orders with status
Processing - Also verify customer/merchant emails, pixel/CAPI event and the order in Dashboard → Orders before sending traffic
Order sync
On confirmed payment we call POST /wp-json/wc/v3/orders:
- Default status:
processing(configurable) - Order notes:
Paid via WooshPayment (session: ch_xxx) payment_method:woopay(orcodfor cash on delivery)- Customer email: WooshPayment sends the branded order confirmation; any WooCommerce emails depend on your store settings/plugins
Compatibility
| Plugin | Compatible |
|---|---|
| WooCommerce Subscriptions | One-time products only. Subscriptions in roadmap. |
| WooCommerce Bookings | Not supported |
| Polylang / WPML | Yes |
| WooCommerce PDF Invoices | Yes |
| WooCommerce Stripe | Disable: WooshPayment uses Whop, not Stripe |
Frequent issues
"401 Unauthorized" after connect
- Check that the site is HTTPS — we don't connect to HTTP
- Reopen WooCommerce → REST API and verify the key hasn't been revoked
- Verify that the permission is "Read/Write" (not just "Read")
Different prices between WooCommerce and WooshPayment
Often a VAT issue. WooshPayment respects WooCommerce's display_prices_including_tax. Check in WooCommerce → Settings → General → Taxes.
"Invalid cart" on the customer side
Prices changed between add-to-cart and checkout. The customer should refresh the cart and try again.